Factory ammo
Factory ammo inventory tracks commercial ammunition you have on hand. You can log rounds by the box, mark rounds as shot, optionally reclaim brass, and log a range group in the same step. The inventory page is separate from your handloaded batches but uses the same grouped view.
Adding factory ammo
Go to Inventory and open the Ammo page. Click Add Ammo. The form asks you to:
- Select a caliber, then select the ammo type from the catalog (the catalog filters to the chosen caliber)
- Enter a purchase date
- For each lot: number of boxes, rounds per box, and optionally a lot number and cost per box
If the ammo you use is not in the catalog, you can add a private entry inline from the quick-add form on the ammo add page. Caliber, brand, grain weight, and bullet type are required; name is optional. You can also add, edit, and delete your private ammo catalog entries from the Component Catalog page under Inventory. That page supports the same catalog management options as brass types, primers, powders, and bullets.
One row per box
Each physical box becomes its own inventory row. If you log 4 boxes of 50 rounds each, the app creates 4 rows, each tracking 50 rounds remaining. This lets you see exactly which boxes still have rounds, when each was purchased, and what each cost. Boxes from different dates or lot numbers stay separate.
In the grouped view, boxes from the same ammo type collapse into one group showing the total rounds and box count. Expand the group to see individual box rows.
Multiple lots
Within a single add form, you can enter more than one lot. Click Add Lot to add a row. Each lot has its own box count, rounds per box, lot number, and cost. All lots share the same purchase date. This is useful when you buy two different lot numbers in the same purchase and want to track them separately.
Editing an entry
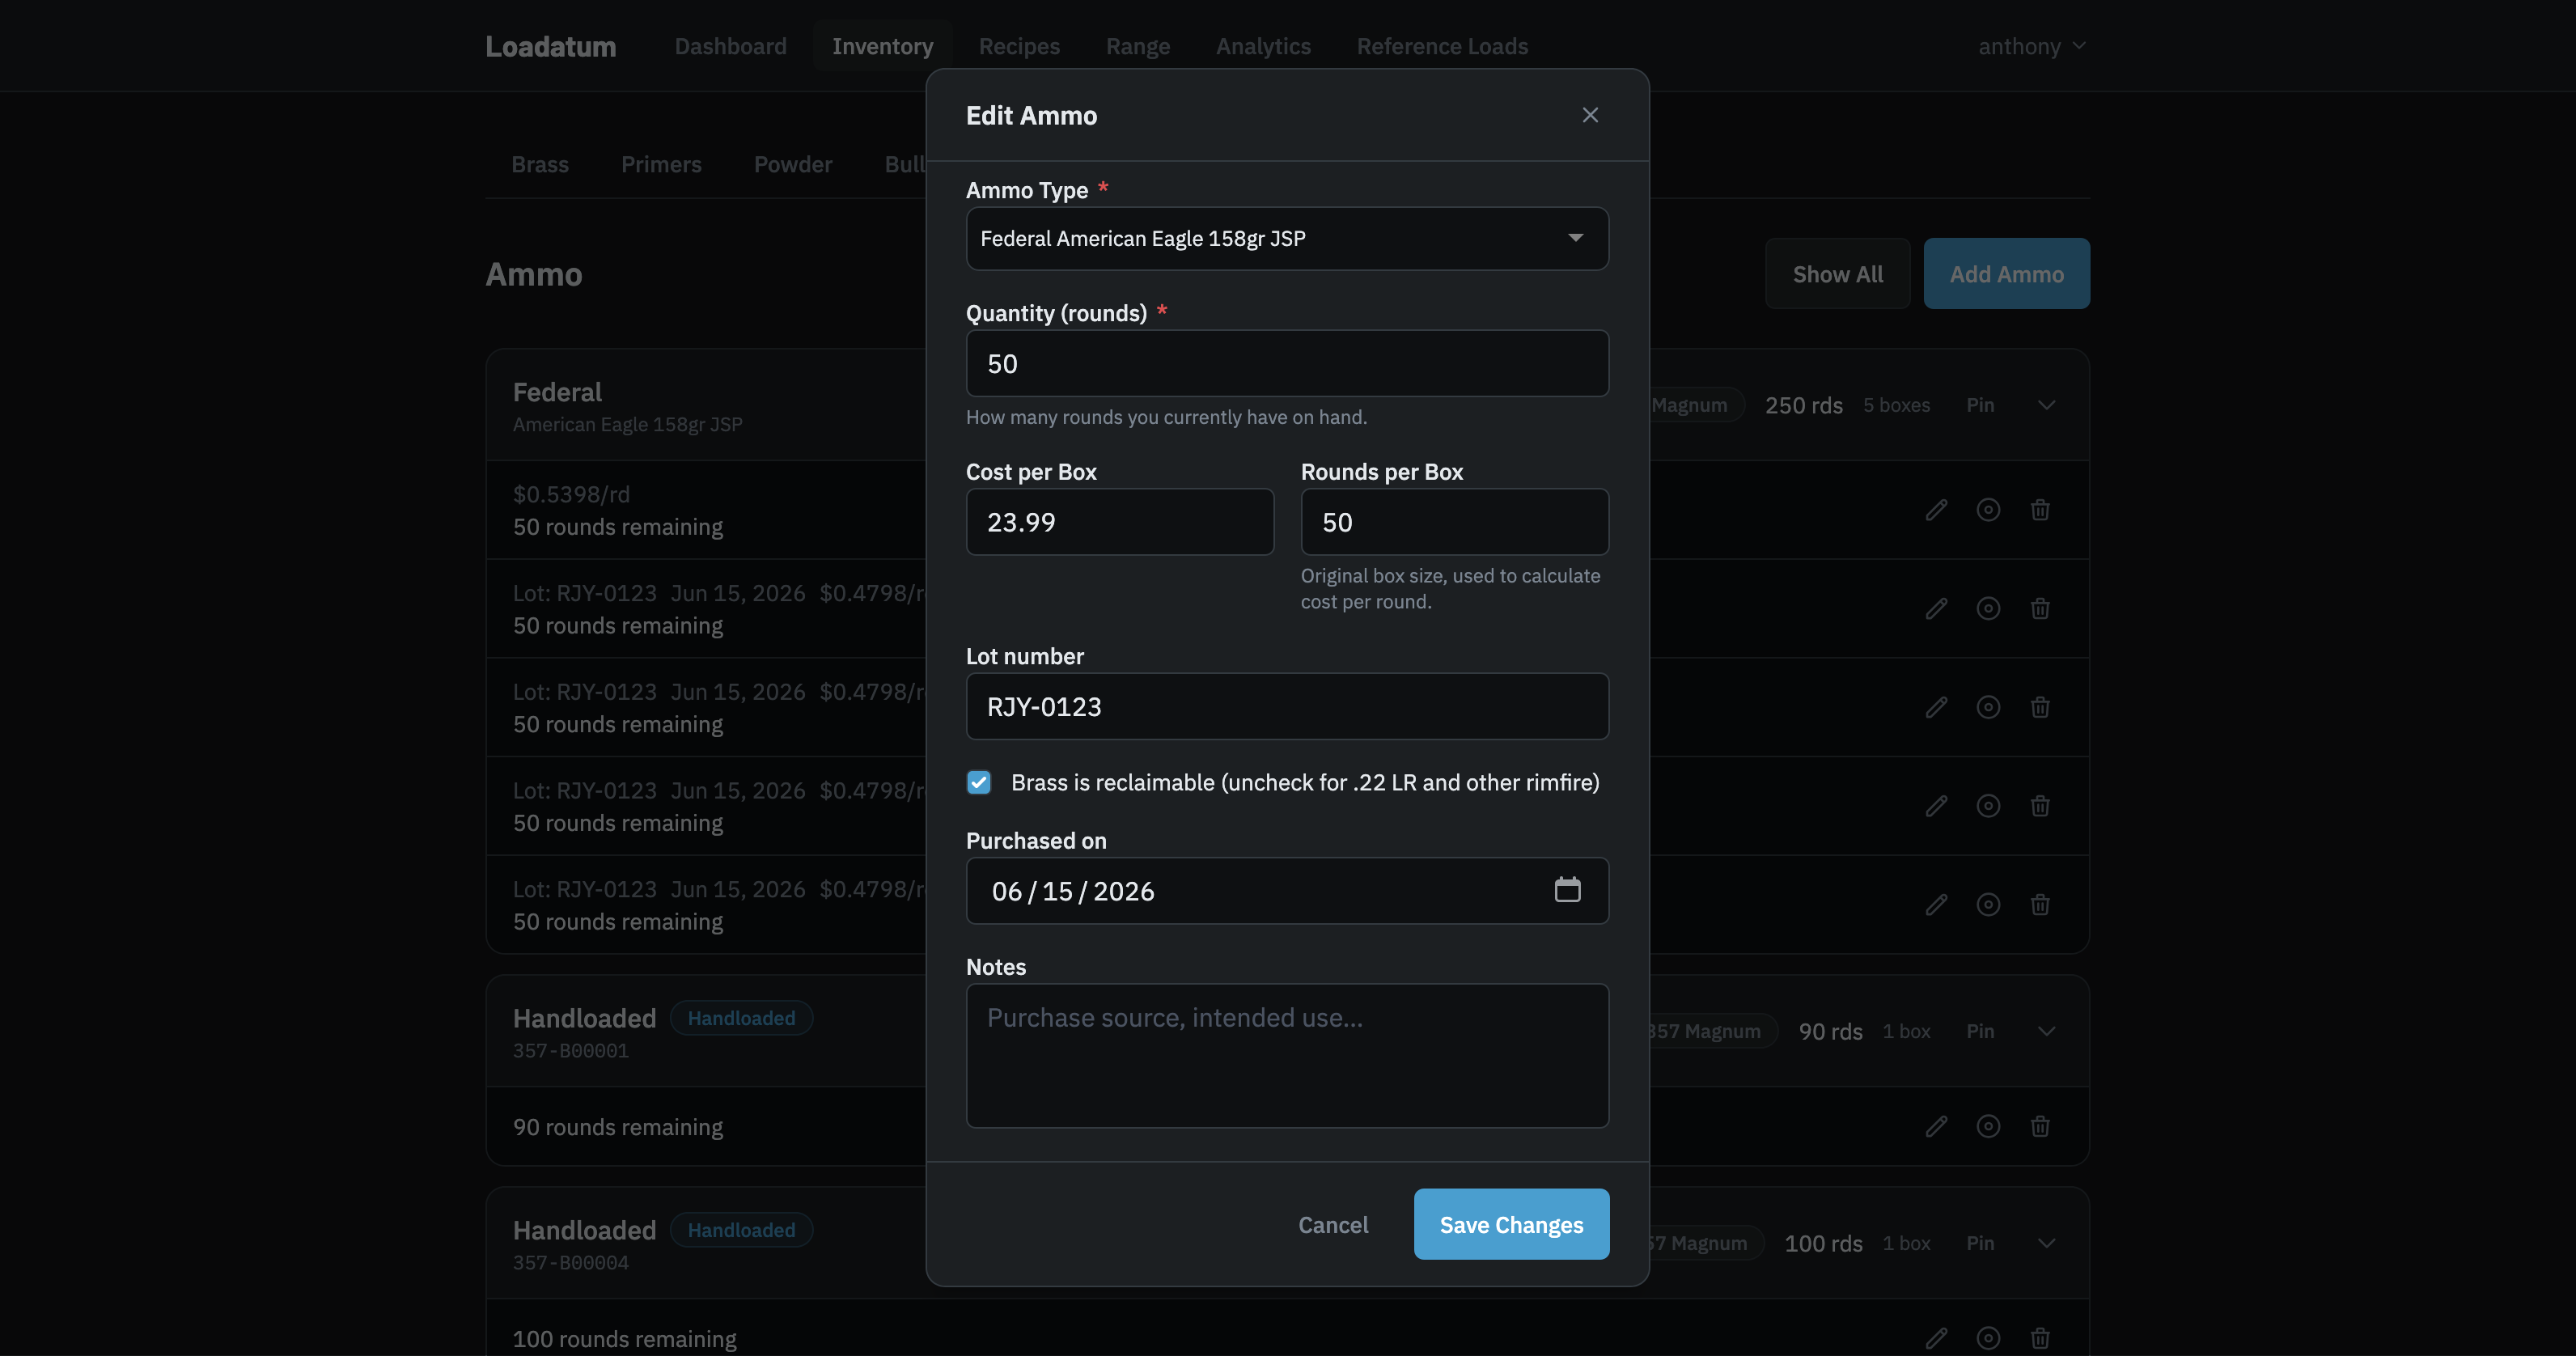
To edit an inventory row, open the Ammo page and click the edit icon on any row. The edit form lets you update the ammo type, purchase date, lot number, brass reclaimable setting, notes, and two fields that serve different purposes.
Quantity (rounds) is the current number of rounds you have on hand for that box. Adjust this if you need to correct the count manually, for example after a discrepancy at the range.
Rounds per Box is the original packaging size. It is used together with the cost per box to calculate the cost-per-round figure shown on each row. Changing this field updates the displayed cost per round but does not affect your round count.
Marking rounds as shot
Open the grouped view, expand the ammo type, and click the mark-as-shot button on the individual box row. Enter the number of rounds fired. You can optionally link the session to a range session and log a group at the same time.
If brass is reclaimable, you can record how many cases you recovered. The app will add those to your brass inventory.
Historical purchases
If you want to record past purchases for cost analytics without adding rounds to inventory, check the Historical purchase toggle in the add form. Enter the number of boxes, rounds per box, and optionally a lot number and cost per box. The app stores the total rounds purchased (boxes times rounds per box) on the purchase record. No inventory row is created, so your round count is not affected.
Cost per round
Cost is entered per box. The app divides the box cost by the rounds per box to show a cost-per-round figure on each inventory row. This is displayed in the grouped view alongside the rounds remaining.
Pinning ammo to the dashboard widget
In the grouped view, each ammo group header shows a Pin button. Clicking it adds that ammo type to the Rounds on Hand widget on your Dashboard, so you can see its current round count at a glance without opening the inventory page.

Once a group is pinned, the button is replaced by a Pinned label. To remove an item, click the × button on its row inside the dashboard widget.
The widget holds up to 8 items. If you are already at the limit when you click Pin, a dialog appears listing your current widget items. Check the items you want to remove, then click Save. The selected items are removed and the new one is added in a single step.